When out on a trail, most of us look at the wilderness around us, absorbing the sights, sounds, and smells of the outdoors. Sure, we look at the trail because if we don’t, we’ll trip over a root before we know it. But how many of us look at the trail with “trail eyes”—that critical observation of the trail itself? Knowing how to evaluate problems with the trail, as well as appreciating the many details that go into trail planning, construction, and maintenance, makes you a better hiker and steward of the wilderness around you.
Developing “trail eyes” will increase our appreciation of the work that trail designers, builders, and trail crews do.
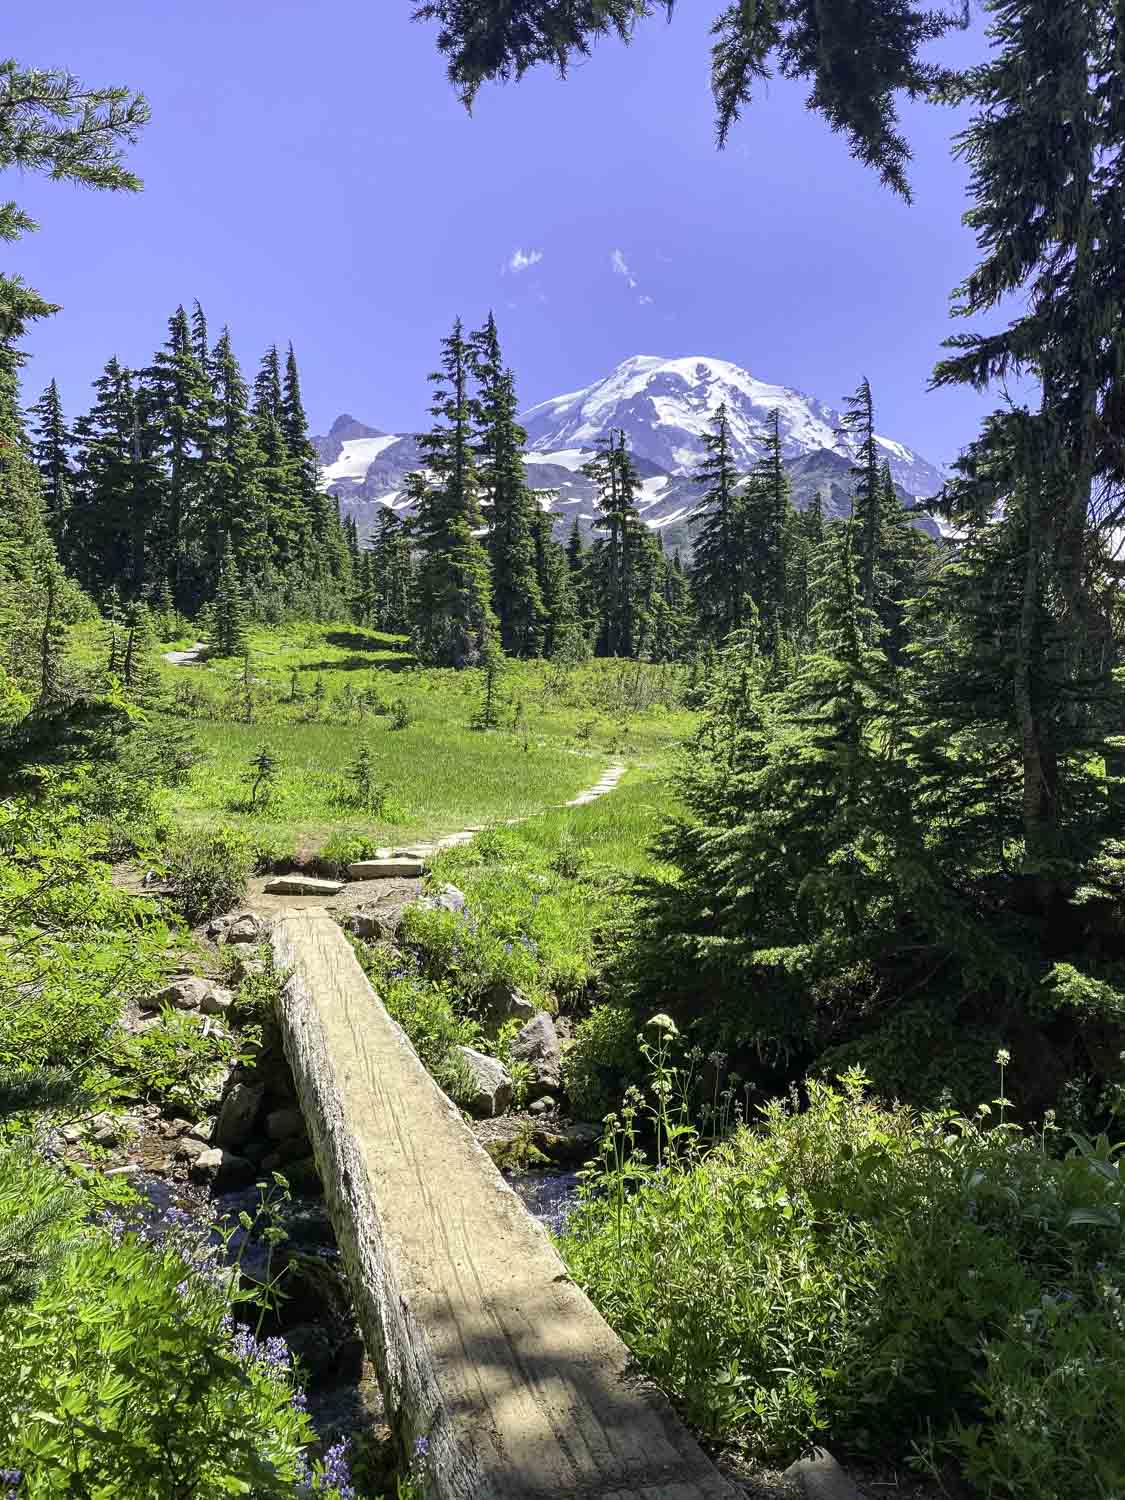
What makes a trail “good”? We can finish a hike and say, “That was a great trail,” but that’s usually based on an overall impression of the hike rather than specific details of the trail. A good trail is designed and maintained with specific users in mind, whether hikers, bikers, or horse riders. Its degree of difficulty is tailored to a specific skill level of the user. It incorporates features along the trail that enhance our enjoyment of the hike—boulders, trees, views, creeks, vegetation, and undulations—without being an encumbrance to our passage through the terrain. The trail surface is easy on the feet, and the brush and surrounding vegetation have been kept clear of the trail. Erosion and water damage have been mitigated, downed trees and branches removed from the trail, and boardwalks and bridges installed where appropriate. A trail is also good when it is easy on the environment. A good trail should be such an obvious fit for the terrain that it should almost seem like it built itself. It should invite us to follow it.
The details of designing trails are beyond the scope of this discussion, but obviously, a well-designed trail requires less maintenance, which is critical in our era of inadequate and inconsistent government funding. Sustainability is key. Controlling erosion and water runoff are the two primary structural issues. Still, a trail design is doomed to failure if human nature is not considered since people tend to follow the path of least resistance!
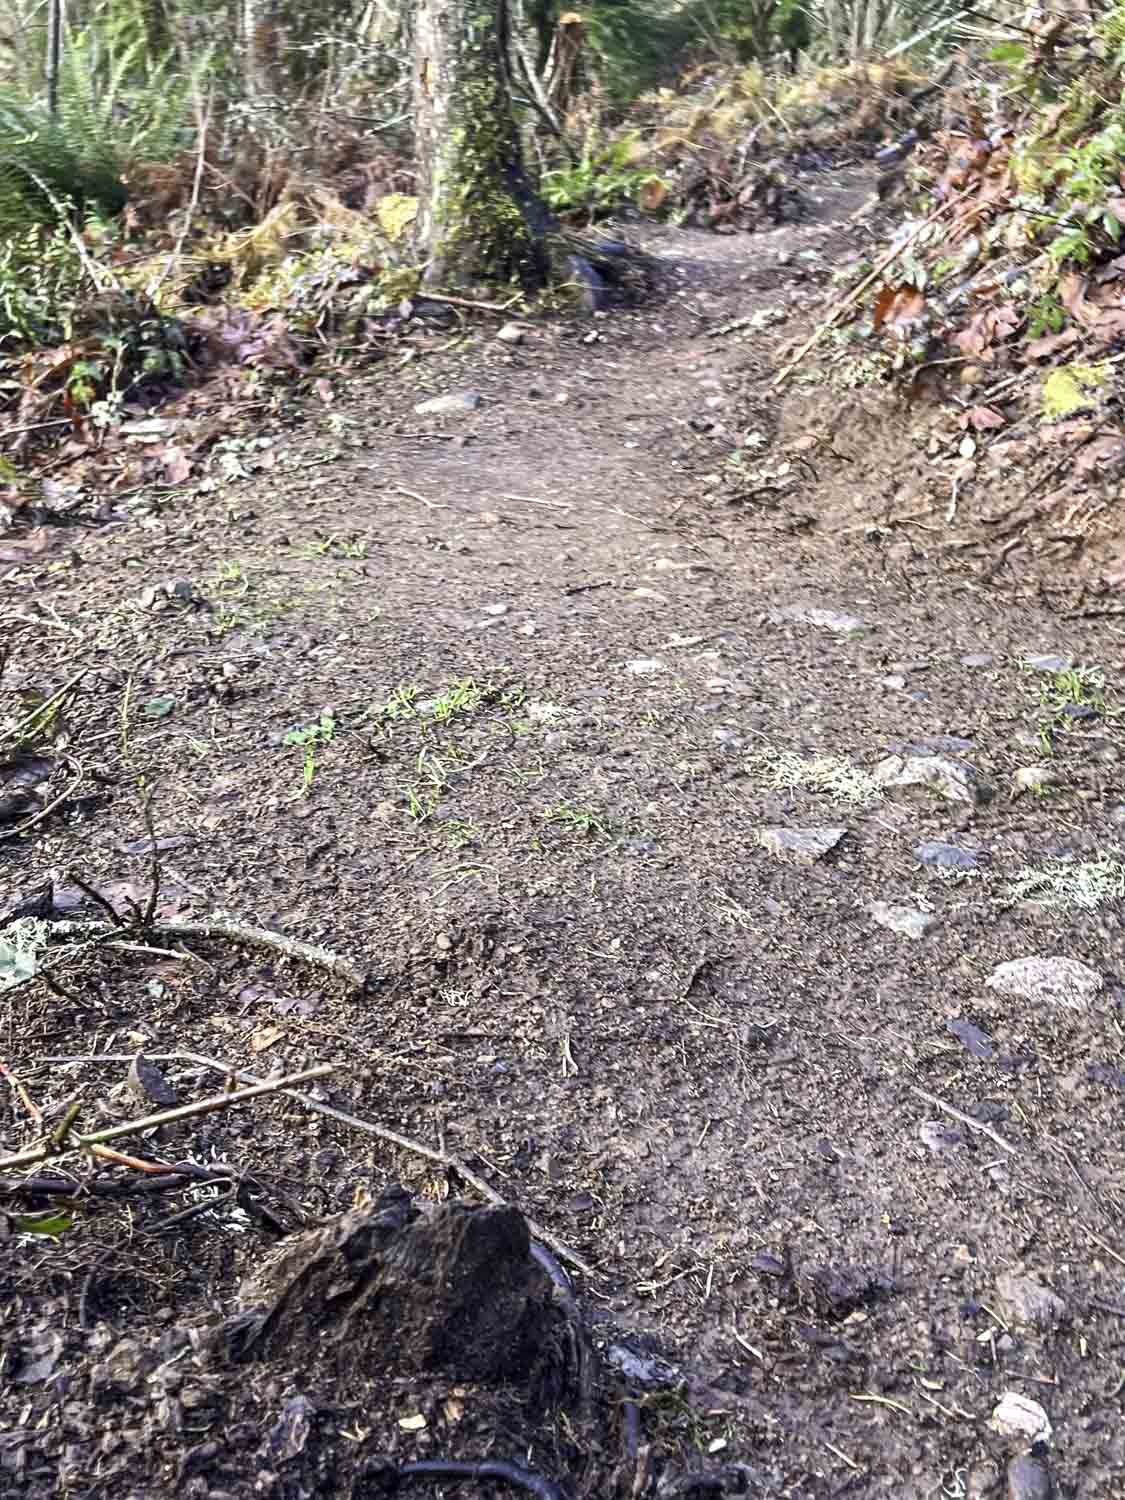
As we hike, if we use our trail eyes to see the subtle and not-so-subtle trail features we pass by, our experience will be enhanced. One of the primary considerations is what class of trail is it? There are five classes of trails, categorized by type of user. These range from a Class 1, or minimally developed trail, which may involve route-finding skills to follow, up to Class 5, which is a fully developed trail, likely ADA compliant, whose surface is likely paved or packed gravel. Roots and rocks on the trail surface may not be a problem for a Class 1, 2, or 3 trail but would need removal for a Class 4 or 5 trail, for example. The trail manager would use the designated class to allocate resources for maintenance and repair.
Trail grade is another major consideration, not only for hiker enjoyment but for sustainability. The average trail grade should be 5-10%, but grades exceeding this will, of course, appear in sections. Steeper grades of more than 20% may require steps or be on a rock surface to be manageable for hikers, and grades this steep create a situation where excessive water runoff can create erosion unless mitigated, and be challenging to maintain. When crossing a slope, the trail builder uses the ½ rule, which means keeping the grade at ½ or less of the percent grade of the slope (for example, if a hillside has a 16% grade, the trail should be no more than 8%). Frequent “grade reversals” are of great benefit in controlling water runoff since the water will run only a short distance down a trail before it reaches a low point. These can be effective even if hardly noticeable.
But with new trail eyes, start paying attention to the low areas along a trail with grade reversals, as these can be places where maintenance is frequently needed. Trail crews may dig drains here to direct the water off the trail, and these can become easily filled with debris. Water bars are often used to direct water off the trail, but these are going out of favor since they are more difficult to construct and maintain (you may see a simple log across the trail, but there is often a foundation of rock or gravel that isn’t visible).
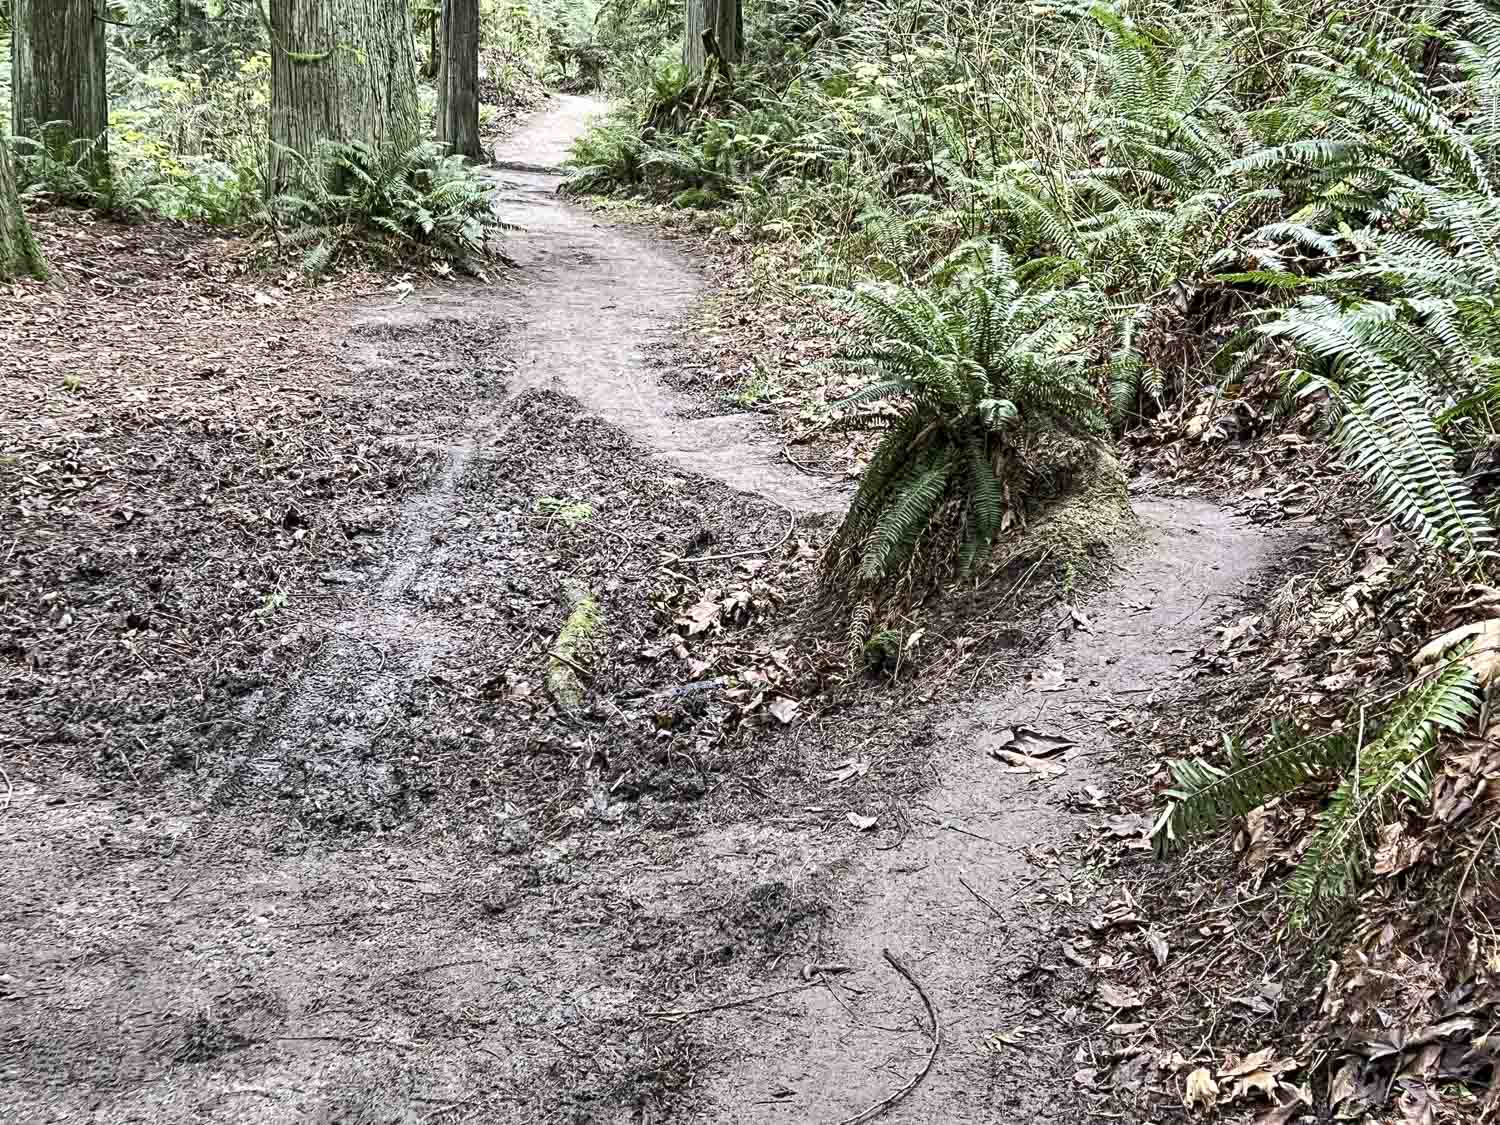
Other tricks to control water runoff include the cross-trail slope—ideally, the trail slopes down 5% from inside to outside (it should not cause your ankles to roll). This also aids in the “sheet flow” of water down the hillside—when water comes down off a slope, it will hit the trail and run off because of the rolling grade and the out-sloped trail. These trail features are important to improve drainage where water creates mud puddles, so people don’t enlarge the trail by hiking around them.
More complicated trail elements used for wetter areas include turnpikes or puncheons. Turnpikes are sections of the trail raised higher than the surrounding water table and slightly mounded in the middle. The undersurface of the trail making the mound may be gravel or, heavier mineral soils, or even synthetic materials. There will be siderails made of rock or logs to protect the trail from erosion. The slope of the turnpike surface directs water to the edges of the trails into small rivulets running parallel to the trail. These must be kept empty and free of debris. Trails that are so rutted and deep that hikers no longer use them and instead are creating side trails called cupped trails. These trails can occur in meadows or areas with softer soils. Repairing them requires turnpikes built on rocky fill to raise the trail, potentially the use of pavers or rocks as well on the surface, and revegetation of the side trails.
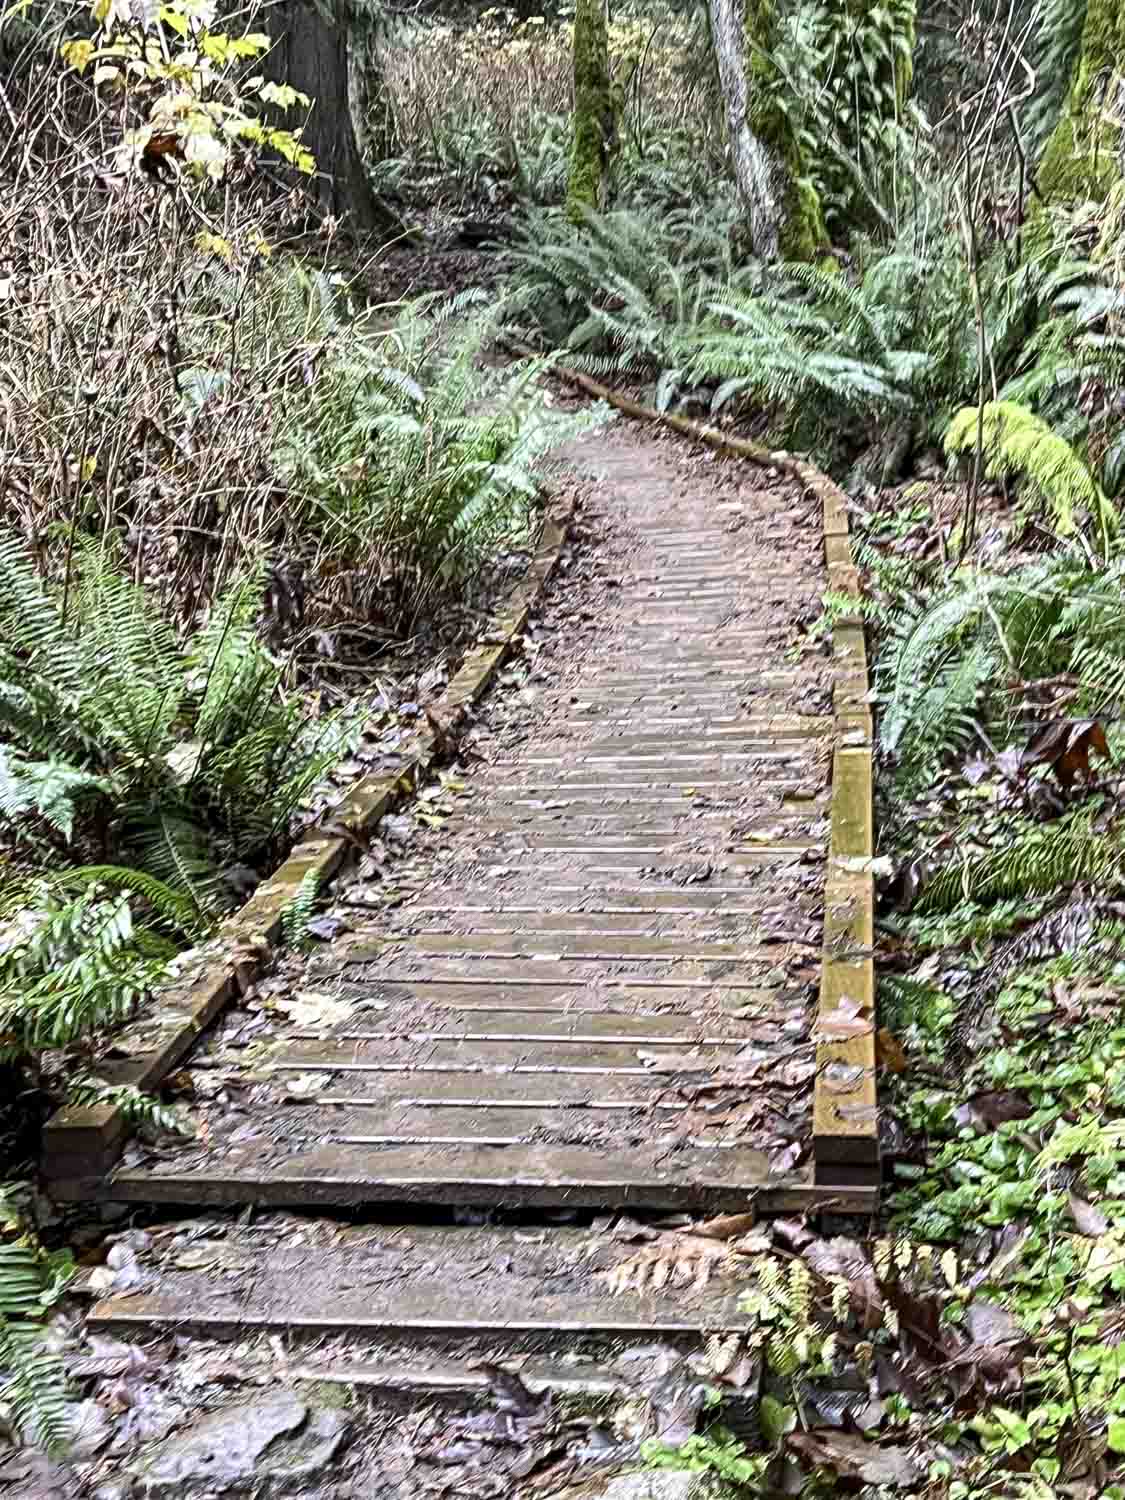
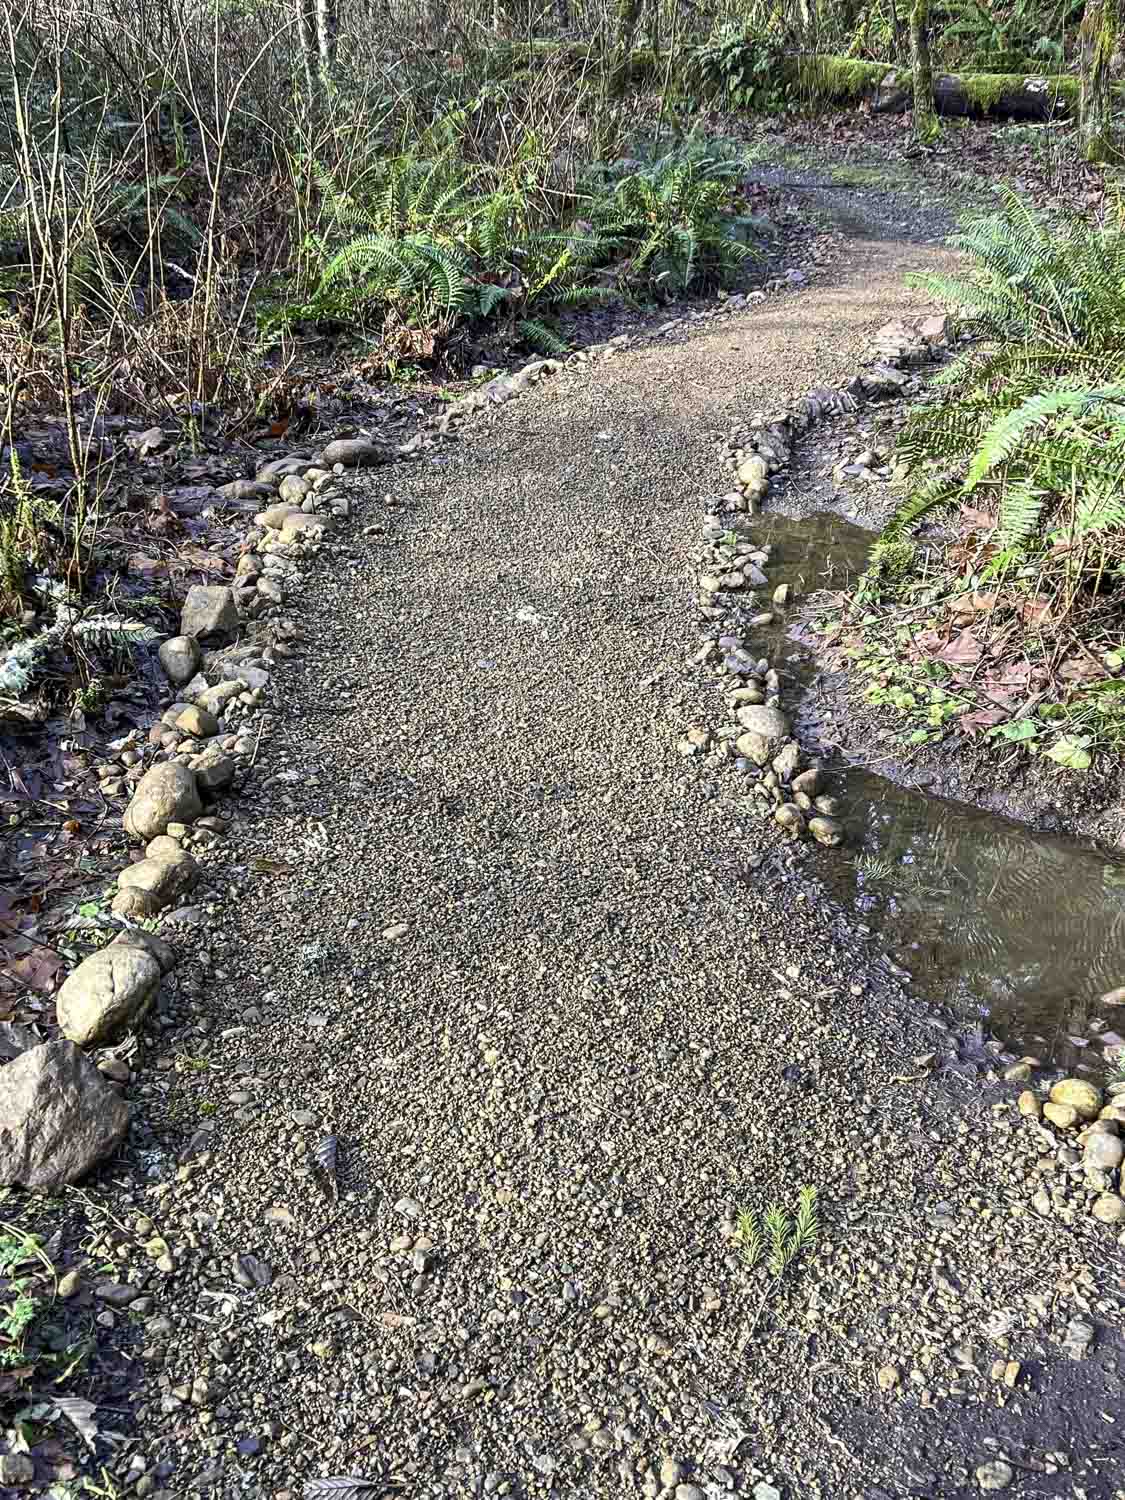
Puncheons are another way of traversing boggy areas when draining the trail is not an option. They are wooden walkways that elevate the trail. These have significant maintenance issues as wood has a relatively short lifespan in certain regions. These require careful engineering to construct. Flat pavers or rocks can be placed in wet or chronically muddy areas as well, but these may be hard to find or transport to the area.
For actual water crossings, the class of trail will determine the technique used. Class 1 water crossings may have no structures to aid the crossing or possibly some well-placed boulders or a log. Class 4 and 5 trails will have a well-constructed permanent structure (logs and handrails), and seasonal bridges are another option for more rugged trails. The designer must first decide if a crossing is needed at all (can the trail continue on the original side?), determine the seasonality of the need for a crossing, and then locate the easiest place to ford the waterway. Maintenance of water crossings is always an issue, and construction is expensive. Culverts can be used for small intermittent streams, but these can easily become blocked with debris.
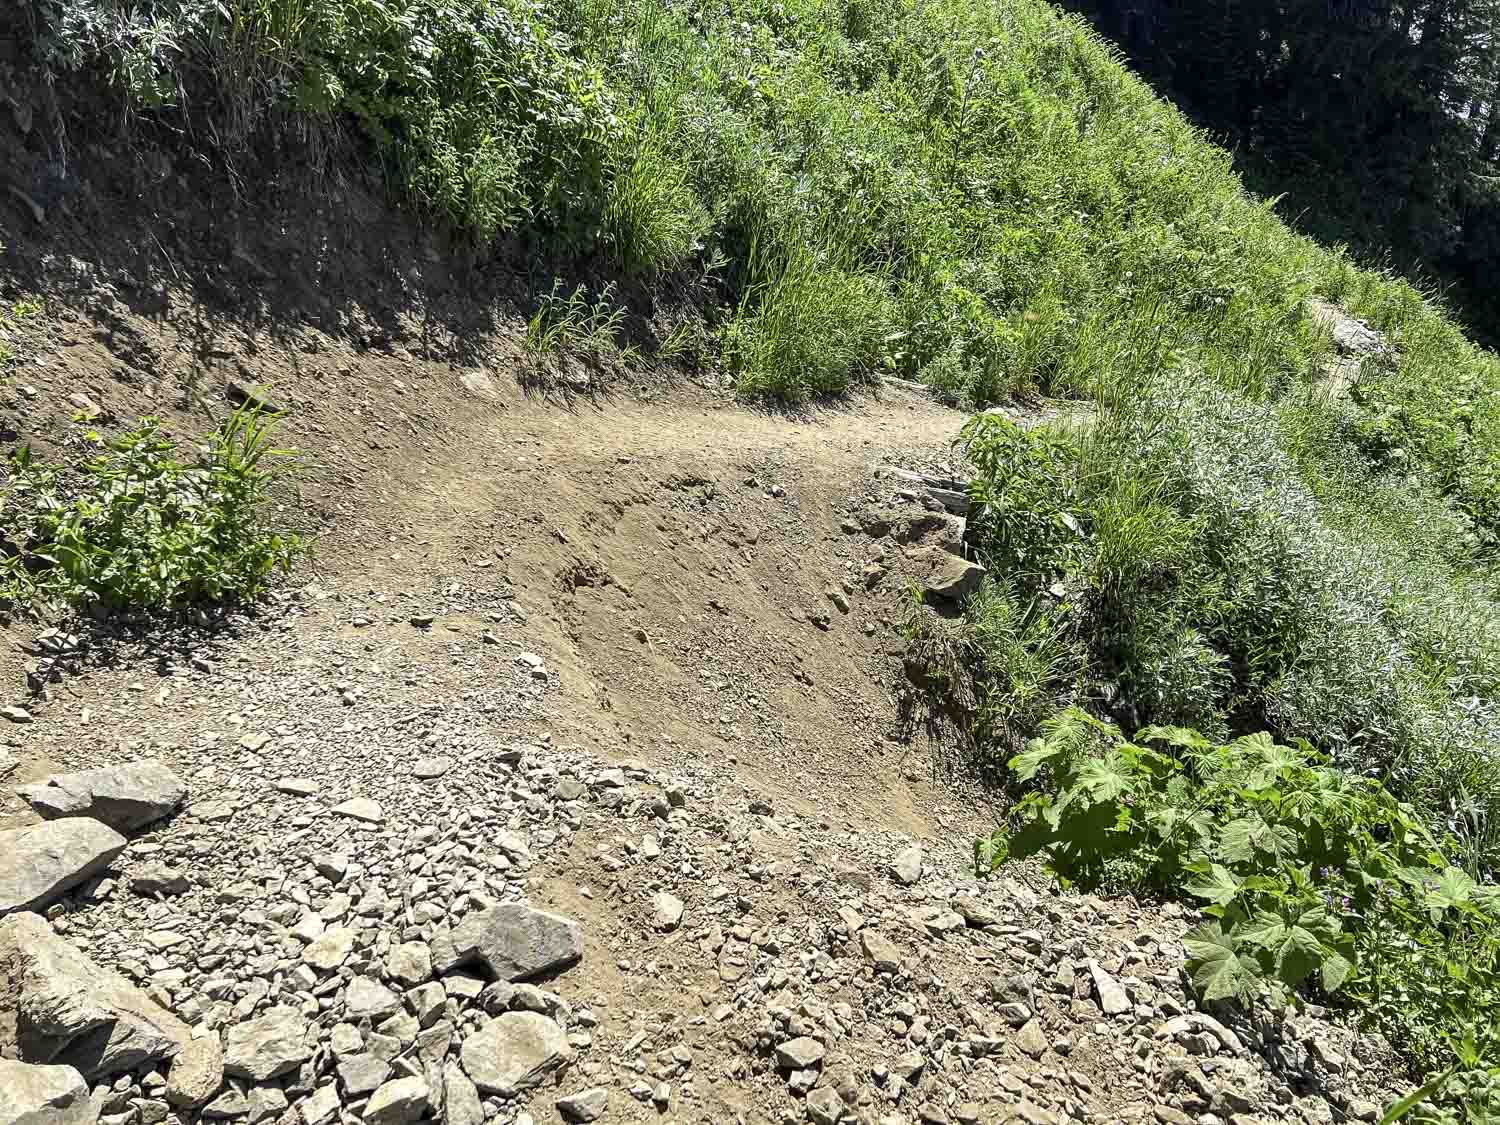
Controlling erosion is also key to trail maintenance. Wide turns or switchbacks are critical to trail design and can help control erosion by lessening the trail’s grade. Besides the obvious reason for making it easier to climb a hill, designers must plan carefully to minimize the temptation of hikers to cut them. Cutting switchbacks is a huge cause of erosion, and they cannot always be successfully repaired. When possible, switchback design should incorporate obstacles in the inner corner (rocks, logs, heavy vegetation) and can be steeply angled or cut a little wider. Rock walls may need to be constructed to stabilize the trail. Sometimes, a slope is so narrow that it may be difficult to use these features. Wide turns are less complicated to construct and maintain and are easier for horses to navigate.
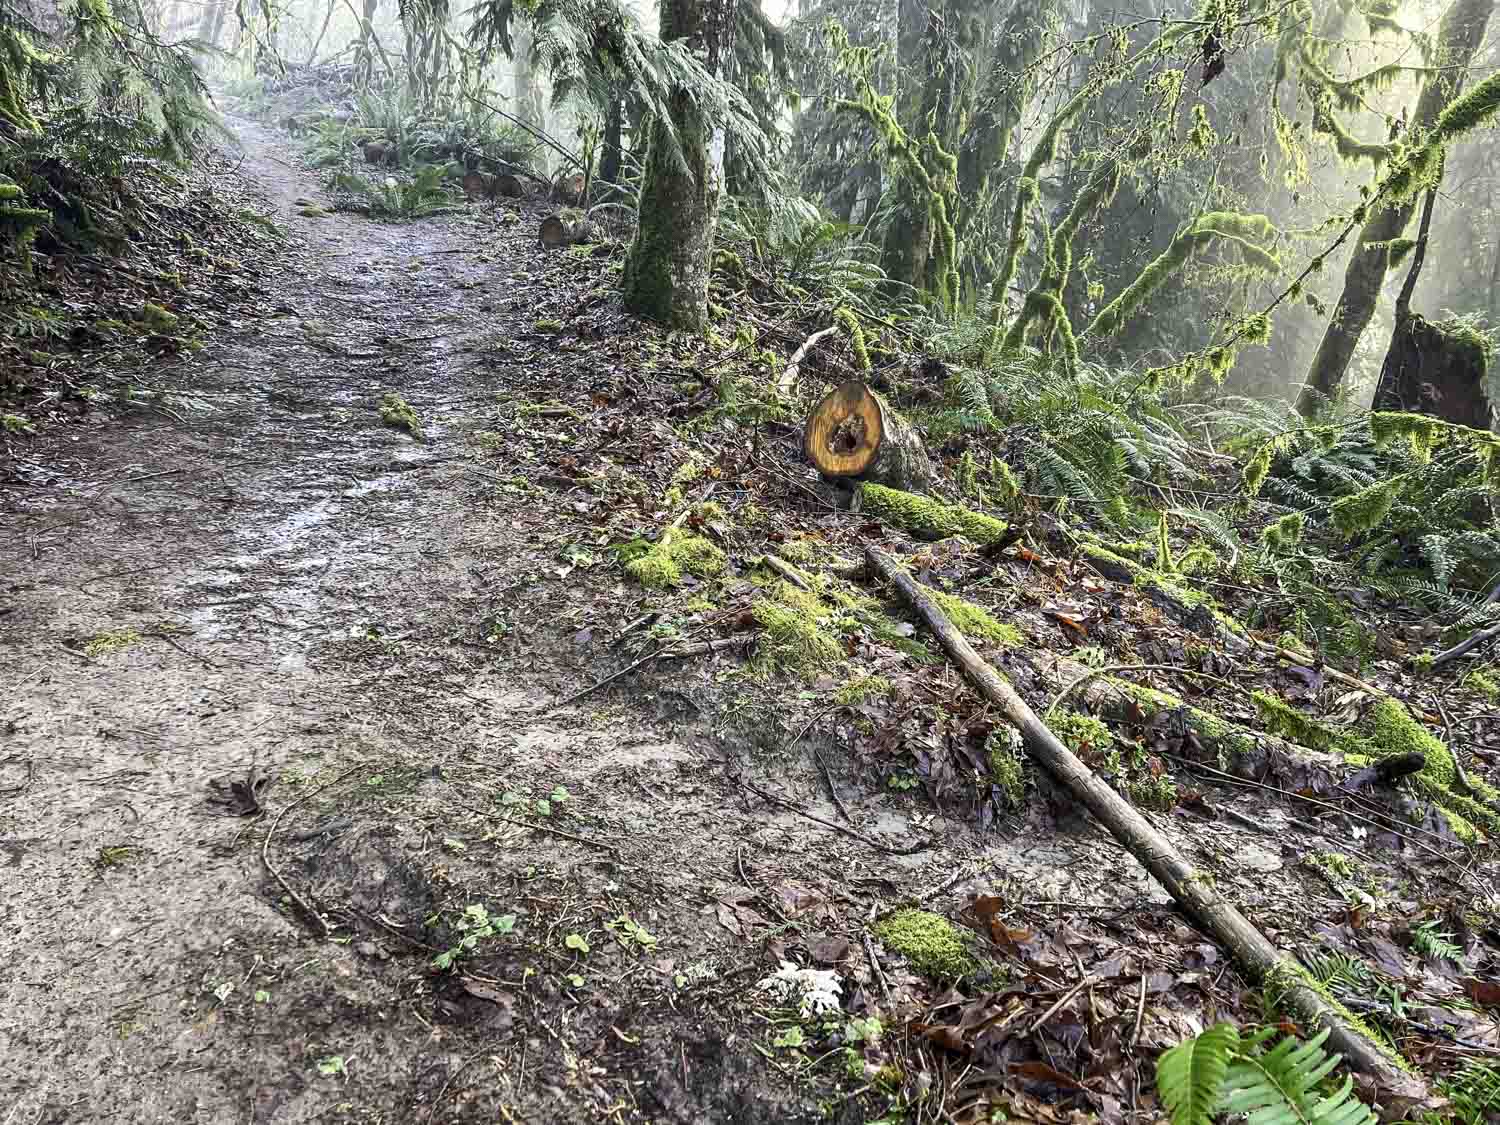
We don’t often contemplate the trail corridor—the surface, sides, and canopy of the trail–but these areas also require maintenance. Depending on the trail grade, the trail should ideally be wide enough that your extended arms don’t touch surrounding vegetation (six feet). Tree branches or downed trees across the trail must be removed for safety, and if horses utilize the trail, a higher canopy is needed. Trail “brushing”—pruning trail edges of vegetation and leaf removal off trails in the fall (heavy leaf fall traps moisture and contributes to mud and erosion)—must be done, especially here in the PNW. Some of these maintenance issues depend on the class of trail.
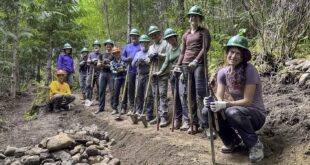
Developing “trail eyes” will increase our appreciation of the work that trail designers, builders, and trail crews do. These crews may be affiliated with the USFS or NPS, maybe contract trail builders, and may also be volunteers involved with other organizations. The Sierra Club and the Washington Trails Association (WTA) are two large groups in our area that do trail work, with the WTA donating more than 71,000 hours of trail work in 2024. Small local groups are also critical to this work, but there are too many to list. Know you are appreciated!
Another reason for developing “trail eyes” is to be a link between boots on the ground and land managers. WTA, for example, emphasizes online Trip Reports, which members and non-members can complete. These reports are helpful to anyone planning a hike to learn about the current conditions of the trail. However, a well-written trail report will also include information about potential maintenance issues encountered on the trail. WTA will send this information along to the appropriate land managers to determine if repair is needed. (To make a trip report especially useful, include photos with scale and as specific a location as possible.) A very important disclaimer, however, is that learning to read a trail is not an invitation to do the work yourself. Trail building and trail maintenance are complex and require specialized equipment, knowledge, and training, and should not be attempted without volunteering for a supervised trail crew. If trail work sounds like fun to you, though, go to https://www.wta.org/volunteer/schedule to find a work party in your area.
The author would like to thank the Washington Trails Association for the concept of “trail eyes” and their training on this subject. In addition, the USDA Trail Construction and Maintenance Handbook, published in 2007, was an invaluable resource and goes into this topic in greater detail.
 Cathy Grinstead, born and raised in northern California, spent her summers backpacking in the Sierra. In 2018, she retired from veterinary practice and moved to Bellingham to explore a different part of the world. She enjoys hiking, outrigger paddling, and snow sports, and loves all that Bellingham has to offer!